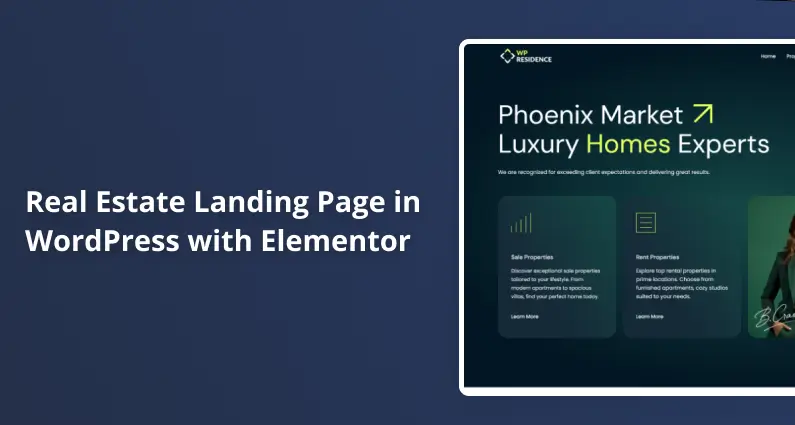
Real estate landing pages are powerful tools for turning online visitors into leads. This guide will explore building an effective real estate landing page using WordPress and Elementor.
We’ll cover different use cases (single property, agent/agency site, or multi-property listings platform), essential elements to include, the step-by-step process for creating your page, and strategies for promoting it for maximum reach.
What Is a Real Estate Landing Page?
A real estate landing page is a dedicated web page focused on a specific goal: usually capturing a lead or promoting a property. Unlike a general homepage, a landing page depends on one offering (e.g., a particular property or service).
It encourages visitors to take a single call to action (such as inquiring about a listing or signing up for more info). For example, clicking on an online ad for a Manhattan loft should lead to a tailored page about that exact loft rather than a generic homepage.
By matching the page content to the visitor’s interests, you can increase conversion rates (the conversion of visitors into inquiries or clients).
Why use WordPress and Elementor?
WordPress provides an easy platform to manage content and plugins, while Elementor (a popular drag-and-drop page builder) lets you design pages visually without coding.
With Elementor, you can simply drag in elements like images, text, forms, and buttons and immediately see the design, which is ideal for quickly crafting professional pages. Additionally, specialized real estate themes (like WPResidence) offer built-in property features and Elementor widgets, making it even easier to include listing-specific components (property grids, search forms, maps, etc.).
WPResidence Theme – a Preferred All-in-One Solution
The WPResidence real estate WordPress theme is highly recommended as a robust starting point. Built for real estate professionals, it fully integrates with Elementor and has 46 ready-made demo sites, including templates for single agents, agencies, and multi-property listings with MLS/IDX integration.
Planning Your Landing Page: Single Property vs. Agent Site vs. Listings Platform
Before building anything, clarify the purpose and type of your landing page. This will affect what elements you need and how you’ll design it.
Real estate landing pages generally fall into a few categories:
Single-Property Landing Page
This page is devoted to one specific property (for sale or rent). It’s often used by agents to showcase a premium listing, or by property owners (or developers) marketing a particular home or unit. The goal is to entice potential buyers/renters and get them to request a showing or more information.
The page will center on one property: high-quality photos, description, price, features, location map, and a contact/lead form. It should provide every key detail a buyer needs at a glance. Essentially, it’s a mini one-page website for the property.
Real Estate Agent/Agency Landing Page
This type of page promotes the services of an individual realtor or a real estate company. It might serve as the homepage for an agent’s website. The focus is building trust and persuading visitors to work with that agent or agency.
Key elements often include an introduction or bio of the agent (“about me” section), professional headshot, credentials or awards, a summary of services, testimonials from happy clients, and maybe a few featured listings to show current offerings or successes.
The call-to-action could be “Contact me for a consultation” or “Get a free home valuation.” A short lead-capture form (to collect the visitor’s name, contact, and what they’re looking for) is handy here.
If you have multiple listings, you might incorporate local market insights or a brief property search feature, but the emphasis is on the agent’s brand.
Multi-Property Listings Platform (Real Estate Website)
A broader landing page (often the homepage of a real estate listings website or brokerage). It’s meant for visitors who want to browse multiple properties. The core element here is usually an advanced property search or filter tool front-and-center so that users can search by location, price, beds/baths, etc. (like a mini Zillow).
For example, WPResidence’s demos often feature a prominent search bar on the homepage, allowing visitors to select criteria (location, property type, bedrooms, etc.) and find listings quickly.
In addition to the search form, the page might show featured or latest properties in a grid or slider format, possibly with thumbnail images, prices, and short descriptions for each listing. Other common elements include an interactive map with property pins, links to key listing categories, and statistics or selling points to build credibility.
Essential Elements of an Effective Real Estate Landing Page
No matter which type you’re creating, the best real estate landing pages share many common elements that drive conversions. Here are the key components to include, along with best practices for each:
Clear, Compelling Headline
The headline is often the first thing visitors see, so make it count. It should succinctly state your offer or the property’s main selling point. For a single property, this could be the property address or a phrase like “Luxury 4-Bedroom Beachfront Villa in Malibu.”
For an agent site, it might be a slogan or value proposition (“Your Trusted NYC Real Estate Expert”). Make sure the headline aligns with whatever ad or link brought the visitor to the page.
If your ad mentions a “Free Homebuyer Guide,” the landing page’s title should also mention it so people feel they’re in the right place. Keep it clear and concise (avoid vague or flowery language).
You have only a few seconds to grab attention, so the headline should immediately communicate what’s on offer and entice the visitor to stay.
High-Quality Imagery
Real estate is a visual domain, so that Appealing images can make or break interest. Include professional photos of the property or relevant imagery on the page.
For a property page, use large, glossy photos of the home’s interior and exterior (living room, kitchen, curb appeal, etc.), and consider an image gallery or slideshow to let users browse multiple pictures.
Many successful landing pages feature a hero or background image at the top, such as a wide shot of a beautiful home or a skyline of your market area.
Ensure the images are relevant (if you’re an agent targeting a particular city, show a recognizable local scene or happy clients in front of homes).
Tip: If possible, include interactive media like a short video tour or 360° virtual walkthrough of the property; this gives prospects an even more profound sense of the space.
Just be careful not to slow down your page: optimize images for the web and use embedded video wisely. The visual content should support your message and evoke the desired emotional response.
Engaging Description and Copy
Alongside visuals, provide a concise but compelling description. For a listing, this means highlighting key features and benefits of the Property: What makes it special? Is it a “spacious 3,000 sqft family home with a pool,” or “walking distance to downtown,” or “recently renovated kitchen and bath”?
Mention the essential specs (beds, baths, square footage, location) and any unique selling points in an easy-to-read format. List major features or upgrades in bullet points so readers can scan them. The tone should be appealing and target your audience’s needs.
If it’s an agent or company page, the copy should convey your value proposition: what services you offer and why you’re the best choice (years of experience, number of homes sold, local expertise, etc.).
Keep paragraphs short and use plain language; avoid jargon that might confuse visitors. Remember, less is more on a landing page – you want to give enough info to pique interest and build trust, but not so much that it overwhelms or distracts from the main call-to-action.
Key Details and Facts
Remember to display the critical facts buyers or clients want to know. For a property, this includes the price (prominently shown), property address (or at least the city/neighborhood), and important stats (bedroom count, bathrooms, area size, lot size, year built, etc.).
Many real estate landing pages use iconography or a brief info section for these – for example, little bed and bath icons with numbers, or a bullet list of “Year Built: 2015 | HOA: $200/mo | School District: XYZ.”
These facts help visitors quickly assess whether the property fits their needs. For an agent page, key facts might include “15+ years experience,” “100+ homes sold,” or “market specialties.” Including such data points and credentials can bolster credibility at a glance.
Essentially, anticipate what questions your visitor has and answer them up front.
Lead Capture Form (Contact Form)
The ultimate purpose of most landing pages is to capture the visitor’s information so you can follow up. Thus, a lead capture form is vital. This is a form where the visitor can enter their name, email, phone, or other details in exchange for something, whether that’s to “Request a Showing/More Info” for a property, or to “Get a Free Consultation” with an agent, or to download a guide.
Keep the form short and straightforward – generally, the fewer fields, the better (name, contact, and maybe one qualifying question like “Are you pre-approved?” or “What’s your timeframe?”). Every extra required field can reduce form submissions, so only ask for what you truly need. Clearly explain what they get by submitting.
Place the form prominently above the fold (visible without scrolling) or use a floating form/button that’s always accessible.
In Elementor, you can create a form with Elementor Pro or use plugins like WPForms or Contact Form 7. If you’re using WPResidence, it has built-in contact form widgets and a customizable “Lead Generation Form” template.
Make sure the form submissions go somewhere useful – typically to an email inbox or a CRM.
Strong Call-To-Action (CTA)
Your CTA is the instruction of what you want the visitor to do next – and you should make it abundantly clear. Common CTAs for real estate landing pages include “Schedule a Tour,” “Request Information,” “Get a Free Home Valuation,” “Contact Agent,” or simply “View Listings.” The CTA often appears as a prominent button or form header.
Use action-oriented language (“Get Started,” “See Pricing,” “Download Guide,” etc.) and create a sense of urgency or benefit (“Schedule a Tour Now,” “See It Before It’s Gone!”). Design-wise, the CTA button should stand out (contrasting color, large font).
It’s wise to place CTAs in multiple places on a longer page—for example, a button in the hero section, another midway, and at the bottom—so that a conversion opportunity is nearby no matter where the user is scrolling.
However, don’t confuse the visitor with multiple different actions; ideally, all CTAs should lead to the same outcome. Consistency and clarity are key.
Trust Signals (Testimonials, Badges, and Social Proof)
Real estate decisions involve big trust. People want to know they are dealing with a credible professional or that a property is represented accurately. Including testimonials or reviews from past clients can significantly boost credibility.
A short quote like “Working with [Agent Name] was a pleasure – we sold our house in 5 days! – John D.” can reassure prospects that others had a good experience.
If you have impressive stats or awards (e.g., “#1 Realtor in City 2022” or logos of certifications and associations), you can also display those. For property pages, sometimes including a well-known secure booking system logo or a statement like “Member of National Association of Realtors” can help.
Please make sure any testimonial used is real and permission has been granted, and keep them relatively brief.
Place these elements strategically so they support your pitch without hijacking the flow.
Navigation and Ease of Use
A pure landing page (for a specific campaign) often has minimal navigation (to keep users focused). However, if this is effectively the homepage of your site, you’ll likely have a top menu (especially for an agency or listings site). Keep navigation simple and obvious.
Include links to important pages like Listings, About, Contact, etc., but avoid a cluttered menu with too many options.
Also consider using a sticky header that allows quick access to search or contact buttons as they scroll. Additionally, ensure your page loads quickly – use optimized images and good hosting.
Real estate pages can be heavy with media, but performance counts: users will leave if a page is slow or broken.
Maps and Location Info
Real estate is all about location. Including a map widget on your landing page can be highly beneficial, particularly for property pages or multi-listing sites. A map gives visitors instant geographical context: they can see where the property is, what the neighborhood looks like, and nearby landmarks.
Embedding a Google Map (or similar) with a marker on the property’s address is common. It helps buyers visualize the area and assess proximity to schools, parks, highways, etc. For a multi-property site, you might have an interactive map with multiple listings pinned, or a “search by map” feature.
If you’re using Elementor, you can use its Google Maps widget or a plugin; WPResidence offers a “Map with Listings” widget you can drop into the layout. A map is informative and builds trust – it shows you’re transparent about the location.
Mobile-Friendly Design
Your landing page must look and work great on mobile devices. Because nearly 70% of web traffic is mobile, much real estate browsing happens on phones and tablets. If your page isn’t mobile-responsive, you risk losing leads who find it hard to navigate or read on small screens.
Fortunately, WordPress, Elementor, and modern themes like WPResidence are inherently responsive. Still, pay attention to how your layout flows on mobile: use large, legible fonts and buttons (easy to tap), avoid any elements that don’t resize properly, and consider a simplified design for mobile with key info at the top.
Test the page on a phone to see the “above-the-fold” content. Your headline and CTA should ideally appear early on mobile.
Also, mobile users benefit from quick actions like tapping to call a phone number or clicking a WhatsApp chat link for agents.
Step-by-Step: Building Your Real Estate Landing Page with WordPress & Elementor
Now that we’ve covered what to include, let’s go through how to create the page using WordPress and Elementor. We’ll assume you have WordPress up and running on a web host. Here is a step-by-step process:
Choose and Install a Real Estate Theme
Start by picking a WordPress theme for your landing page. Since we want to use Elementor, it’s important that the theme is Elementor-compatible. WPResidence is an excellent premium theme tailored to real estate.
Ins
Install Elementor (and Necessary Plugins)
If you imported a WPResidence demo, Elementor is likely already installed because WPResidence relies on it for page building. If not, install the Elementor plugin (the free version allows a lot of design flexibility; Elementor Pro adds powerful features like forms, but since WPResidence has its widgets, you may not need Pro). Also, installing any real estate-specific plugins is required.
Once Elementor is up and running, you’re ready to design.
Plan Your Page Layout and Sections
Before diving into editing, take a moment to plan the structure of your landing page. Based on the type (single property, agent, or listings platform), decide what sections you’ll include and in what order.
A typical single-property page layout might be: Header → Hero section with property title & image slideshow → Key details (price, specs) → Description/About property → Features list → Photo gallery or video tour → Location map → Agent/Contact info (with form) → Footer.
An agent site landing page could be: Header/nav → Hero section with agent photo + headline → Intro about the agent/agency → Search bar or Featured Listings → Services or Why Choose Me → Testimonials → Contact form CTA → Footer.
A multi-listing homepage might have: Top bar & logo → Big search form as the hero → Featured or Latest Properties grid → sections for different categories → About blurb → Footer.
Design the Hero Section
The hero section is at the top of your page and is usually the most visually impactful area. You can edit this with Elementor by clicking “Edit with Elementor” on your page. For a single property, your hero might be a full-width image or a slider of pictures of the house.
WPResidence has widgets like “Property Slider,” or you could use an Elementor Image Carousel widget with the property photos. You can overlay the property headline and key info if you want. If possible, ensure the price or status (For Sale/For Rent) is visible here.
For an agent page, the hero might be a photo of you or a lovely city skyline with a bold tagline. You might use a static image or video background for a listings site. Most importantly, add the primary Call-to-Action in this section.
If using WPResidence, you can insert the Advanced Search form widget here. Make sure the search or CTA button is visually prominent (use a bright color that contrasts with the background). Keep the text minimal in the hero: a short headline or tagline and the CTA are enough.
Add Property Details and Description Sections
Next, build out the sections that provide details. In Elementor, you can create new sections (for example, a two-column section for a single property: left column text, right column sidebar with facts).
Using WPResidence’s property widgets can save time: they have a “Property Address” widget, a “Property Details” widget, and even pre-made sections like “Overview,” “Features,” “Video,” and “Map” that you can drop in.
If you prefer manual formatting, you can create an “Overview” section with a text block summarizing the property or agent, followed by a “Features” list.
Use bullet points or icons to list things like
“✔️ 2-Car Garage,”
“✔️ Hardwood Floors,” etc.
For an agent page, this middle part might include a short bio (“About Me”) and services offered.
Incorporate Listings or Search (if applicable)
If your page needs to show multiple properties (for an agency or portal), decide how to present them. For example, you could have a “Featured Properties” section showing a handful of listings.
You can choose a card style that includes a photo, price, and key info. Drag that widget into your page and configure it (e.g., show 6 properties in 3 columns). The search form is crucial for a multi-property site: ensure it’s placed prominently.
The idea is to make it easy for visitors to start finding properties.
Insert Lead Capture and Contact Elements
Dedicate a section to lead capture. After providing information and listings, you’ll often want a clear Contact/CTA section. For example, create a section titled “Interested? Get in Touch!” or “Schedule a Viewing” with a contact form.
In WPResidence, you have a “Contact Form” widget or even an “Agent Contact Form” that automatically sends inquiries to the listing’s agent. Design this form to be inviting: perhaps a short blurb and the form fields. Keep the form accessible – above the fold if possible, or have a “Contact Me” button that scrolls down to this form section.
Also, include alternate contact info: some people prefer calling, so listing a phone number in text is helpful (you can hyperlink the phone for one-click calling on mobile). If you are an agent, add your headshot and a brief line in this contact section for a personal touch.
Launching and Promoting Your Real Estate Landing Page
Creating the page is only half the battle. Now, you need to drive traffic to it. A landing page with no visitors will yield no leads, so you need a marketing plan.
Here are several strategies to promote your real estate landing page:
Search Engine Optimization (SEO)
Your page can be found by people searching online. Use relevant keywords (like “homes for sale in [Town]” or “[Town] real estate agent”) in your content and meta tags. Over time, this can help organic traffic from Google.
Also, if possible, get backlinks to your page. For example, if you’re an agent, your profile on your brokerage’s site may link to your landing page, or you can write a guest blog for a local site and include the link.
Submit your site to Google Search Console to get it indexed faster. While SEO for real estate takes time to show results, it’s valuable for long-term traffic.
Also consider local SEO: if this is an agent or agency page, create a Google My Business listing for your business and include your website link.
Pay-Per-Click (PPC) Advertising
One of the quickest ways to get traffic is to run paid ads. Google Ads allows you to bid on keywords so your page appears at the top of search results as an ad. For example, you might bid on “2 bedroom condo in Dallas” and have your landing page show up.
You only pay when someone clicks your ad. PPC can immediately bring highly targeted visitors. But only if your ad copy closely matches your landing page content.
Set a reasonable budget and track results. Real estate keywords can be competitive, so target specific niches or long-tail keywords to keep costs manageable.
Another PPC avenue is Facebook/Instagram Ads. You can create targeted campaigns where you choose demographics (e.g., people aged 30-65 in your city who have interests in real estate).
Facebook’s targeting is powerful; you can retarget people who have visited your site before. Visual ads with home photos can perform well.
Social Media Marketing
Beyond paid ads, leverage your social channels. Post about your landing page on Facebook, Instagram, LinkedIn, Twitter, and any other platform you use for real estate. For example, share the link with a caption: “Take a virtual tour of my new listing at 123 Maple Street! 👉 [landing page URL].”
You can also post to relevant groups (local community groups or real estate interest groups) , but be mindful of group rules about self-promotion. Use link stickers in stories on Instagram, or put the link in your bio. The beauty of social media posts is that they can reach people who already trust you, which could lead to referrals.
Also consider visual content: post a short video walkthrough on YouTube and link to the page in the description, or create a Pinterest board for the property. The key is consistent promotion – share updates or different angles over time.
Email Marketing
If you have an existing list of contacts or leads (past clients, newsletter subscribers, or people who signed up on your site), send an email about your landing page to them.
For a single property page, email your subscriber base with “New Listing Alert: [Property Address]” with teaser details and a button to view the landing page. For an agent services page, you might announce “Now offering free home price evaluations; sign up here,” linking to your lead page.
Email is a direct line to people who have already engaged with you, so it often yields high-quality traffic.
This is email marketing: Your existing mailing list recipients likely know and trust you already, making them more likely to respond to your landing page CTA. Just ensure the email itself has a clear call to action and is not too wordy.
There you have it: a complete roadmap for creating high-converting real estate landing pages using WordPress and Elementor. From understanding the different types of landing pages to implementing essential elements like compelling headlines, professional imagery, and strategic lead capture forms, you now have all the tools needed to transform online visitors into qualified leads.


