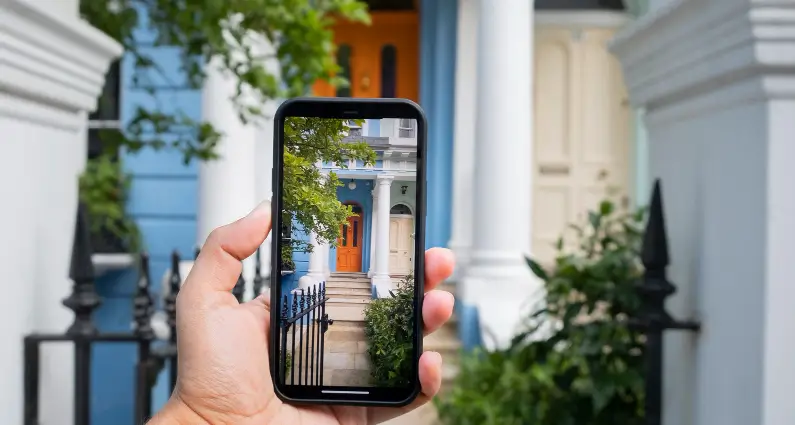
Real estate marketing online depends heavily on strong visuals that immediately grab attention. Crisp, inviting images make buyers want to learn more, but large files can drag a site’s performance.
That’s where image optimization comes in. It’s about shrinking file sizes, setting proper dimensions, and smartly naming photos. People won’t always realize these steps are behind the scenes, but they’re vital for any agent, investor, or property manager aiming for top results in digital listings. Below is a look at why images matter so much in real estate, along with solid strategies and WordPress tools you can use right now.
Why Images Are Vital for Real Estate Marketing
Most property searches start online. Studies say 93% of homebuyers use websites in their hunt, and many rely on mobile apps. It only means listing sites must load quickly, or people will bail out.
Research shows that users expect websites to open in 3–5 seconds, but a review of popular real estate sites found a median load time of 6.9 seconds. That delay can cause significant drops in engagement, and large, oversized photos are often the culprits.
Then there’s the emotional side of home buying. Logic might get folks in the door, but feelings push them to set up a showing. Images that spark excitement or connection can make a home stand out. That’s why slow, clunky image delivery is such a missed chance. If pictures take too long, users lose interest and may click away.
Key Image Optimization Strategies
Compression Methods
Shrinking image file size is often the easiest fix. Compression can be split into two main types:
Lossy
This method removes some image data while keeping the core appearance. It can dramatically reduce file sizes, which is helpful for big pictures or background shots. JPEG/JPG is the typical lossy format. There’s a catch: saving images repeatedly in a lossy format can lower quality bit by bit, so keeping a backup of the original is a good idea.
Lossless
This style keeps quality intact by not discarding data. It works well when you want to maintain each detail of a property photo, such as a unique backsplash or delicate architectural touch. The saved files may be larger than lossy options but are often smaller than uncompressed originals.
Dimensional Adjustments
Image dimensions also play a key role in speed. The width and height of a photo (measured in pixels) affect appearance and file size. For desktops, a width of around 1920 pixels is standard, while for mobile, many real estate pros keep images at a maximum of 800 pixels to better fit small screens. The goal is to find a balance: big enough to look good but not so large that it slows loading.
Experts typically use 72 dots per inch (dpi) resolution for the web. That’s enough clarity without overdoing file size. It’s easy to forget dimension settings, but your site visitors will notice if images take forever.
File Naming & Metadata
Search engines crawl image file names, so it’s a good practice to include property details or location data in each filename. Instead of “image1.jpg,” label your listing photos with relevant names like “1234-main-st-living-room.jpg” or “lakewood-three-car-garage.jpg.”
The same goes for alt text. It’s usually a short phrase describing the image, which helps people with visual impairments and gives search engines extra clues about the content on your page.
Examples of SEO-friendly naming:
- “1234-main-st-kitchen-granite-counters.jpg”
- “sunset-condo-miami-balcony-view.jpg”
Tagging images with relevant features or local terms can also boost visibility. Some folks skip these steps because it takes effort, but the payoff is worth it when you get more site visitors and a better ranking.
Image Placement That Boosts Engagement
Photos shouldn’t just be tossed randomly; ensure each picture supports the surrounding text. For instance, if you’re writing about a home’s remodeled kitchen, place a close-up of the stylish countertops next to that description. That’s a simple way to keep people reading.
Bullet points that might help:
- Use multiple angles of the property, such as the front exterior, living area, kitchen, and backyard
- Place lifestyle or “action” shots (like a cozy reading nook) near relevant details
- Show off special features or local attractions so buyers can imagine living there
Folks crave a visual guide. Strong placement ups the impact and keeps the page flowing.
Extra SEO Steps
Lots of real estate pros use alt text only for accessibility, but search engines pay attention to it as well. A good alt description with local keywords might help your listing surface higher in Google Image searches.
Structured data is another handy trick. It’s when you add extra info about the image to your site’s code. It might include the creator’s name, property address, or license details. Structured data will help with indexing, making your pictures more straightforward to spot. It’s not a magic bullet, but every small advantage counts.
WordPress Optimization Plugins
WordPress users can shrink, rename, and manage images automatically. Some plugins specialize in compression, while others provide lazy loading (which means images load only when someone scrolls to them, saving bandwidth). A few well-known plugins include:
Smush
It’s a free plugin that compresses images without losing quality in most cases. It also handles lazy loading, so your pages might pop up faster. One limit is that it won’t optimize images over 1MB in the free version, but the paid plan removes that barrier and provides deeper compression.
EWWW Image Optimizer
It offers both lossy and lossless compression modes. Real estate sites can choose the option that best fits their high-resolution needs. The plugin is straightforward and can run bulk operations on existing images.
ShortPixel
You can pick from lossy, glossy, or lossless compression. “Glossy” is somewhere between keeping detail and trimming file size. This plugin works quietly in the background, and many property pros like the user-friendly dashboard.
Measuring Your Results
Once you optimize, it’s good to see whether your efforts made a difference. Page speed tests show if your load times have dropped. One study found that real estate sites lowered image payload by about 64% after applying compression. In some cases, page load times improved from nearly 7 seconds to just over 3 seconds.
That change can push bounce rates down sharply since fewer visitors will give up waiting.
A few indicators to watch:
- Pingdom or GTmetrix scores before and after optimization
- Google PageSpeed Insights for mobile and desktop
- Bounce rate from Google Analytics or a similar tool
When pages load smoothly, potential buyers stay longer, which often leads to better lead generation and more showings.
Manual Tools for More Control
WordPress plugins can handle routine tasks automatically, but manual editing programs give you extra power to fine-tune. GIMP (GNU Image Manipulation Program) is a free option that’s worth exploring.
Here’s a quick outline:
- Open your image in GIMP by clicking File → Open.
- Select Image → Scale image to adjust width, height, and resolution.
- Before saving, pick a compression level. In GIMP, you can move a slider to reduce file size without giving up too much detail.
- Save or export under a new name so you keep the original safe.
Manual editing is helpful when you have extra time or want to preserve a photo’s specific features. An image of a gorgeous scenic view might need a lossless approach, while a background shot can be highly compressed.
Image optimization is often the hidden factor that separates good listings from great ones. Real estate shoppers want quick load times and compelling visuals. You stand out in a crowded field by shrinking images, choosing the correct formats, and labeling them thoughtfully.
WordPress plugins, along with tools like mlsimport.com, make the process less stressful and keep your site humming. Manual programs like GIMP let you zoom in on every detail. Each method has its place, and it’s about finding a routine that works for your brand.
These steps can improve conversions, lower bounce rates, and create a more welcoming experience on every device. That mix of speed and style helps show professionalism and tells clients you care about every aspect of their home search. The results might look simple but speak volumes about your commitment to quality and user satisfaction.
FAQ
What does image optimization actually involve for real estate listings?
Image optimization is the combination of shrinking file sizes, setting appropriate pixel dimensions, and using descriptive file names and alt text so your listing photos load quickly and are easier for search engines to understand. Practically, that means compressing images, resizing them so you are not serving oversized photos, and labeling each image with property-relevant details instead of generic names like “image1.jpg.”
Should I use lossy or lossless compression for property photos?
Use lossy compression when you need a big reduction in file size and can tolerate a small loss of image data, which is common for large photos or background-style shots; JPEG/JPG is the typical lossy format. Use lossless compression when preserving fine detail matters (for example, distinctive finishes or delicate architectural features) because it keeps quality intact by not discarding data, though files may be larger than lossy versions.
If you choose lossy, keep a backup of the original image because repeatedly saving in a lossy format can degrade quality over time.
What image dimensions and resolution should I target for faster load times?
For desktop displays, a width around 1920 pixels is a common standard, while for mobile many real estate professionals cap images at a maximum of 800 pixels to better fit smaller screens. The goal is to strike a balance: large enough to look crisp, but not so large that you are forcing visitors to download unnecessary pixels.
For resolution, 72 dpi is typically used for the web because it provides sufficient clarity without inflating file size.
How should I name real estate listing images and write alt text for SEO?
Use descriptive file names that include property details or location signals that match what a buyer might search for. Instead of “image1.jpg,” use names like “1234-main-st-living-room.jpg” or “sunset-condo-miami-balcony-view.jpg” so search engines can better interpret the image content.
Alt text should be a short description of what the image shows. It supports accessibility for users with visual impairments and also gives search engines extra context, so adding relevant local keywords naturally (where appropriate) can help your images perform better in search results.
Which WordPress tools can help optimize images, and how do I measure the impact?
On WordPress, plugins can automate compression and related tasks, and some also add lazy loading so images load only as visitors scroll. The article highlights Smush, EWWW Image Optimizer, and ShortPixel as common options with different compression modes and workflows.
To measure impact, compare page speed and engagement metrics before and after optimization. The article suggests using Pingdom or GTmetrix, Google PageSpeed Insights (mobile and desktop), and bounce rate data from Google Analytics or a similar tool to confirm whether load times and user behavior improved.