Here’s the thing about real estate websites – they’re absolute bandwidth hogs. You’ve got dozens of high-res property photos, video walkthroughs, virtual tours, and those interactive maps clients love to zoom around on. Imagine someone in Singapore trying to load your listings when your server sits in a data center in Ohio. They’re basically waiting for data to bounce halfway around the world.
I’ve watched this play out dozens of times. A client showed me their beautiful website, packed with stunning property photos, and we checked the load time from Asia or Europe. Eight seconds. Ten seconds. Sometimes worse. And you know what happens? Visitors leave. They’re gone before your hero image even loads.
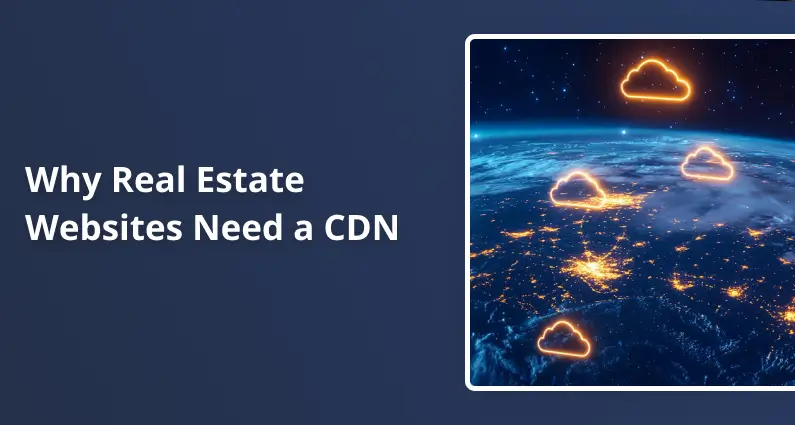
That’s where a Content Delivery Network (CDN) comes in. A CDN is a network of servers scattered worldwide that stores copies of your website’s files. When someone visits your site, they get everything from the server closest to them instead of your main hosting. It’s simple in concept but powerful in practice.
Over the past few years, I’ve seen consistent results from setting up CDNs for real estate agencies. Load times drop by 30-50%, bounce rates improve, and Google rankings increase. More importantly, those contact forms get submitted so that people can see the properties they’re interested in.
The Way CDNs Actually Work (No Tech Degree Required)
Let me explain this without getting too nerdy. Imagine running a real estate office, but instead of one location, you have satellite offices in every major city worldwide. Each office keeps copies of all your property brochures. When clients enter the Tokyo office, they get a leaflet from Tokyo, not one shipped from New York.
That’s essentially what a CDN does with your website files. You upload those gorgeous property photos to your WordPress site. The CDN automatically copies them to servers in hundreds of cities – London, Dubai, Sydney, São Paulo, you name it. Someone viewing your site in Dubai gets those images from a Middle East server. Someone in Australia pulls from an Australian one.
The technology gets smarter than just storing files, though. When a visitor lands on your property listing, the CDN checks whether it already has those images nearby. If it does, boom: instant delivery. If not, it grabs them from your primary server once, stores them, and then serves them to everyone else from the local copy. No more repeated trips across oceans for the same photo.
Modern CDNs also handle your CSS files, JavaScript, fonts, and even optimize how data travels between servers. WordPress makes this easier than you’d think. Plugins like WP Rocket and W3 Total Cache connect with most CDN providers without writing a single line of code.
Why Real Estate Sites Get Hit Harder Than Others
Property websites are different from blogs or business sites. A typical blog post might have 2-3 images. A single property listing? Try 30-50 high-resolution photos, maybe a video tour, Google Maps embedded, possibly a 360-degree view. Every visitor downloads all of this straight from your hosting server if you don’t have a CDN.
I tested this with a real estate agency in Dubai last year. They were getting traffic from all over Asia and Europe. Visitors from Singapore were staring at loading screens for 8-12 seconds. We implemented a CDN, and that dropped to under 3 seconds. Within two weeks, their contact form submissions jumped 40%: same website, same properties, just faster delivery.
Google pays attention to this stuff, too. Page speed directly affects your search rankings. In competitive real estate markets where the top 3 Google results capture maybe 75% of the clicks, being faster than your competitors matters a lot.
Choosing Your CDN Provider (The Options That Actually Work)
I’ve tested most of the major CDN providers with real estate sites. Some are great for security, others focus purely on speed, and a few try to do everything. Here’s what I’ve learned works for property websites.
Bunny.net has become my go-to recommendation for growing agencies. They operate 123 server locations, their WordPress plugin takes 5 minutes to set up, and you only pay for what you use. At around $1 per terabyte of bandwidth, it’s affordable even if you’re a smaller brokerage just getting started. The downside? No free tier, though they give you 14 days to test it out.
Cloudflare is the big player everyone knows. It has 310+ locations in 120 countries. It’s free plan perfectly handles most real estate sites and includes basic DDoS protection. I use Cloudflare for clients who need a broad geographic reach without spending money up front. Free users don’t get guaranteed uptime or direct support, but its paid plans start at $20/month and add better security.
Amazon CloudFront works incredibly well if you’re already in the AWS ecosystem. They have 600+ edge locations delivering content globally. Setup is definitely more involved than other options—you’ll need some comfort with the AWS console. It’s best for larger agencies with technical staff or a trusted developer.
Envira CDN automatically converts images to WebP format for sites primarily about photos, shrinking file sizes by 25-35%. It hooks directly into your WordPress media library with literally one click. However, it only handles images, so you’ll need another solution for videos and scripts.
KeyCDN appeals to people who want detailed control. Their CDN Enabler plugin rewrites URLs automatically, and the instant cache purging feature helps when you’re constantly updating listings. The $49 minimum purchase might seem steep for smaller agencies, but the pay-per-use model usually saves money over time.
Walking Through the Setup Process
I’ll use Cloudflare for this walkthrough since it’s free and what I set up most often. Other providers follow a similar pattern, just with different dashboards.
Getting Started With Your Account
Head to Cloudflare.com and add your domain. Cloudflare scans your existing DNS records and imports them automatically. If you use email with that domain, double-check that everything looks right, especially your MX records.
The Nameserver Switch
Cloudflare gives you two nameserver addresses. Log in to wherever you bought your domain: GoDaddy, Namecheap, or whoever, and swap out the existing nameservers for Cloudflare’s. This usually takes 15-30 minutes to kick in worldwide. Your site stays up during this, so don’t worry about downtime.
Installing Your Caching Plugin
Grab WP Rocket or the free W3 Total Cache plugin from the WordPress repository. These work with your CDN to optimize everything. In WP Rocket, find the CDN settings and flip them on. Enter your CDN domain, which is usually your regular domain if you use Cloudflare.
W3 Total Cache needs a bit more setup. Go to Performance, then General Settings. Enable CDN, pick your provider type, and enter your CDN URL in the configuration area.
Setting Up What Gets Cached
You need to tell the CDN what to cache and what to leave alone. In Cloudflare’s dashboard, go to Rules, then Page Rules. Create one that caches everything for your static stuff like images, CSS, and JavaScript. Then add an exclusion for /wp-admin/* and /wp-login.php so your WordPress admin area doesn’t get cached.
Nobody wants to log into WordPress and see cached content from an hour ago. Trust me on this one.
Turning On SSL and HTTP/2
Cloudflare provides free SSL certificates. In the SSL/TLS section, pick “Full” if your hosting already has SSL or “Flexible” if it doesn’t. Under Network settings, turn on HTTP/2. This lets browsers download multiple files simultaneously instead of one at a time.
Testing From Different Locations
Use GTmetrix to check load times from various locations around the world. Pick test locations that match your clients’ locations: London, Dubai, Singapore, wherever. Compare your before-and-after numbers. You should see 40-60% faster load times for people visiting from overseas.
What Real Estate Sites Are Seeing in the Real World
Property Guru runs the largest property portal in Southeast Asia. It drowned in bot traffic and dealt with slow loading times across five countries. After it implemented Cloudflare’s CDN and security features, malicious bots dropped by half, and it started blocking 23 million threats every month. Load times improved across the board, with its Indonesia site seeing the most significant gains. Visitors who used to wait 6+ seconds were now loading listings almost instantly.
There’s a home lifts manufacturer that worked with JIT Global Infosystems. Their WordPress site was a disaster – 30+ second load times, 40+ servers struggling to keep up. They moved their static content to Amazon CloudFront and restructured everything. Load times dropped to 2.5 seconds. They cut their server count from 40 down to 17. Monthly costs fell by 20%.
I personally worked with a Dubai agency serving clients across the Middle East, Europe, and Asia. We tested Cloudflare against what they had before. The CDN was delivering content in under 50 milliseconds for most visitors. Before? We were seeing 300-500 milliseconds regularly. Their Google rankings climbed for competitive terms like “Dubai apartments” and “Marina properties.” More visibility, more leads, more sales.
The Practices That Actually Move the Needle
Pick Servers Close to Your Audience
If most of your clients are in the Middle East, ensure your CDN has solid coverage. Cloudflare and Bunny.net run multiple servers in Dubai, Bahrain, and Saudi Arabia. Check your Google Analytics to see where your traffic comes from, then verify your CDN has presence in those regions.
Optimize Images Before You Upload Them
CDNs work better when you feed them quality content. Compress images before adding them to listings using something like ShortPixel or Imagify. Convert to WebP when possible: a 5MB photo compressed to 800KB loads faster, even with a CDN helping you out.
Think About Cache Expiration Times
Property listings change constantly. You don’t want a “For Sale” sign cached for weeks after the property sold. Set shorter cache times – maybe 1-2 hours – for listing pages. Static stuff like your logo and theme files can cache for a week or more. Most caching plugins let you set this up differently for different content types.
Watch Your Cache Hit Ratio
This number tells you how often the CDN serves content from its cache versus grabbing it fresh from your server. You want 80% or higher. Lower numbers mean your caching rules need adjustment or you’re not including the right file types. Cloudflare’s analytics dashboard shows this front and center.
Lock Down Your Origin Server
Turn on origin shielding if your CDN offers it. This puts an extra layer between edge servers and your hosting, cutting down on direct requests. Also, configure your firewall only to accept traffic from your CDN’s IP ranges. This prevents attackers from bypassing your CDN and hammering your server directly.
Keeping Everything Running Smoothly
CDNs aren’t something you set up once and forget about. They need some regular attention to keep performing well.
Check your analytics every week or so. Look for sudden drops in cache hit ratio or weird spikes in bandwidth usage. These usually mean something’s misconfigured or you’ve got bot traffic. Most CDN dashboards show bandwidth broken down by country, which helps spot unusual patterns.
When you update a listing, purge just that page’s cache instead of nuking everything. Changed a property’s status or price? Clear just that one page. WP Rocket and W3 Total Cache both let you do selective cache clearing. Cloudflare enables you to purge by using a specific URL or tag.
Keep your WordPress plugins updated monthly, especially the caching and CDN ones. Outdated plugins can conflict with CDN features or open up security holes. I usually enable automatic updates for security patches, but review significant version changes manually before clicking yes.
Test whenever you make significant changes. Like added a new property search feature?
Run speed tests from multiple regions. Switched themes? Make sure all your assets are loading from the CDN. Open your browser’s developer tools, check the Network tab, and verify files are showing your CDN domain instead of your primary host.
Making This Work for Your Agency
The real estate sites that benefit most from CDNs share some common traits. They showcase properties across multiple countries, feature high-quality media that looks great but weighs a lot, and compete in crowded markets where every second of load time costs them potential clients.
If you’re not sure this is worth it, start with Cloudflare’s free plan. You’ll see improvements right away without spending anything. For agencies managing 500+ listings or serving video tours regularly, consider paid options like Bunny.net or CloudFront, which give you more bandwidth and actual support when things go wrong.
If you’re comfortable with WordPress, the technical setup may take an hour or two. If DNS changes and plugin configuration aren’t your thing, hire a WordPress developer for the initial setup. Plenty of developers on Codeable specialize in this kind of performance work.
Remember that CDNs work alongside good hosting; they don’t replace it. Pair your CDN with solid WordPress hosting like Kinsta or WP Engine for the best results. Together, they create a fast, reliable foundation that won’t let you down when traffic spikes or someone worldwide wants to browse your listings.
The property market moves fast, and your website needs to keep up. A properly configured CDN means that whether someone’s browsing from Berlin or Bangkok, your listings load quickly and look exactly how they should.
FAQ
What is a CDN, and why does it matter so much for real estate websites?
A Content Delivery Network (CDN) is a network of servers distributed around the world that stores copies of your site’s static files (like images, CSS, JavaScript, and fonts). When someone visits your real estate website, the CDN serves those files from a server close to the visitor instead of forcing every request to travel back to your main hosting server.
This matters disproportionately for real estate because listings are media-heavy: a single property page can include 30-50 high-resolution photos, video tours, embedded maps, and sometimes 360-degree views. Without a CDN, every visitor pulls all of that straight from your origin server, which increases load times, especially for overseas clients.
What kind of results can a real estate agency expect after setting up a CDN?
The practical wins are faster page loads for visitors who are far from your hosting location and fewer people abandoning your pages before listings render. In the examples discussed, CDNs commonly reduced load times by about 30-50%, and overseas load-time improvements were often dramatic (for example, dropping from 8-12 seconds to under 3 seconds after implementation).
Those performance gains can translate into business outcomes. The article notes improved bounce rates, improved Google rankings (since page speed affects search performance), and increased contact form submissions after speeding up the site.
Which CDN provider should I choose for a WordPress real estate site?
It depends on your constraints and how hands-on you want to be. Cloudflare is a common starting point because its free plan can handle most real estate sites and it has broad geographic coverage (310+ locations in 120 countries), plus basic DDoS protection. Bunny.net is positioned as a strong option for growing agencies, with a quick WordPress plugin setup and pay-for-what-you-use pricing, but it does not offer a free tier (it does offer a 14-day test).
If you are already invested in AWS or have a technical team, Amazon CloudFront can be an excellent fit, but setup is more involved. If your biggest issue is image weight, an image-focused option like Envira CDN can help by converting images to WebP and reducing file sizes, but it only handles images so you would still need another solution for videos and scripts.
How do I set up Cloudflare as a CDN for my WordPress real estate website without breaking anything?
Start by adding your domain in Cloudflare and letting it import your existing DNS records, then double-check critical records like MX entries if you use email on that domain. Next, switch your domain’s nameservers at your registrar (for example, GoDaddy or Namecheap) to the two nameservers Cloudflare provides; this typically propagates worldwide in about 15-30 minutes and your site should remain up during the transition.
Then connect WordPress to the CDN using a caching plugin such as WP Rocket or W3 Total Cache. Finally, configure caching rules so static assets (images, CSS, JavaScript) are cached while sensitive areas are excluded, specifically /wp-admin/* and /wp-login.php, so the admin area is not served stale. Turn on SSL in Cloudflare (choose Full if your host already has SSL, or Flexible if it doesn’t) and enable HTTP/2 so browsers can fetch multiple files in parallel.
How do I keep listing content fresh if a CDN is caching my pages?
Use cache expiration times that match how frequently your inventory changes. The article recommends shorter cache times (around 1-2 hours) for listing pages that can change status, price, or availability, while allowing longer caching (a week or more) for truly static assets like your logo and theme files.
Operationally, avoid clearing the entire cache every time something changes. When you update a listing, purge only that specific page so the rest of the site continues to benefit from cached delivery. Tools mentioned include selective cache clearing in WP Rocket and W3 Total Cache, and Cloudflare’s ability to purge by URL or tag.