How to Build a Real Estate Website with WordPress
Last updated: May 9, 2026
Disclosure: WPResidence and MLSimport are products from the same publisher as this guide. We recommend them as our primary picks and have compared them honestly against alternatives throughout.
Do you want to build a real estate website with WordPress?
You’re in the right place. Buyers don’t start at your office anymore. They start on Google, on Zillow, on their phones. All home buyers used the internet during their search, and 88% used a real estate agent or broker to complete the purchase, per NAR’s 2024 Profile of Home Buyers and Sellers (highlights compiled by NAR Deputy Chief Economist Dr. Jessica Lautz). If your site can’t show up there, you’re handing leads to the agent who can.
The good news: building a real estate website with WordPress is a lot easier than you might think. In this step-by-step guide, we’ll walk you through everything : from picking your hosting and theme to importing live MLS listings and adding content that turns browsers into clients. You don’t need to be a developer to build a real estate website that competes. Solo agents and developers building for clients follow the same 7 steps.
There are a few ways you can build a website and we cover those in the article “DIY vs done-for-you“. We also review a lot of “real estate website builders” and after all this research we think WordPress is one of the easiest solutions to start with.
Why WordPress Is the Best Choice for a Real Estate Website
WordPress is the best platform to build a real estate website on. The numbers back it up.
WordPress powers 42.2% of all websites and 59.6% of all CMS-detected websites, per W3Techs. Every plugin developer, hosting company, and SEO tool builds for WordPress first.
The real reason WordPress wins for real estate is technical: a WordPress real estate site uses custom post types. A theme like WPResidence registers a “Properties” post type, so every listing gets its own URL, its own page, and its own search-engine index entry. Wix and Squarespace can’t do that.
Here’s a quick look at the alternatives.
Wix
- Pros: No coding, fast setup, drag-and-drop builder.
- Cons: No real IDX/MLS plugin ecosystem; limited SEO control; content locked to their platform.
Squarespace
- Pros: Beautiful templates, polished design out of the box.
- Cons: No native IDX support; no custom post types; not built for property databases.
Custom-built (coded from scratch)
- Pros: Total control over functionality and design.
- Cons: Thousands of dollars in development costs; ongoing developer dependency; slow to launch.
You’ll also see full-service IDX SaaS platforms like Real Geeks, Placester, and BoomTown. These typically run as monthly subscriptions in the low- to mid-hundreds-per-month range, and you don’t own your content. When you build a real estate website on WordPress instead, you own the content, the SEO, and the listings. Permanently.
What You’ll Need Before You Start
To build a real estate website with WordPress, you need to: 1) register a domain, 2) get WordPress hosting, 3) install WordPress and pick a real estate theme, 4) set up property listings, 5) connect an IDX/MLS plugin, 6) add lead-capture content, and 7) optimize for performance and SEO. Most realtors can have a working site live in under a week.
- Register a domain.
- Get WordPress hosting.
- Install WordPress and pick a real estate theme.
- Set up your property listings.
- Connect an IDX/MLS plugin.
- Add lead-capture content.
- Optimize for performance and SEO.
Here’s everything you’ll need before we dive in. Don’t worry, we’ll explain each one as we go.
- Domain name (about $12/year from Namecheap or Google Domains).
- WordPress hosting (SiteGround, Kinsta, Cloudways, or Bluehost; Step 1 covers your choices).
- Real estate WordPress theme (WPResidence is our top pick; Step 2 covers it).
- IDX/MLS plugin subscription for live listings (mlsimport; Step 5).
- Active MLS board membership if you want live MLS listings.
- Optional premium plugins: SEO, caching, security, forms (Step 7).
Note: Use WordPress.org (the self-hosted, open-source version), not WordPress.com. Real estate themes and IDX plugins won’t run on WordPress.com basic plans.
Regional note: This guide is written for US and Canadian agents. UK agents should read our estate agent website builder UK guide first: the hosting, theme, and content steps overlap, but the listings/feed step (Step 5) is fundamentally different because the UK uses Rightmove/Zoopla portal feeds instead of MLS/RESO.
Step 1: Choose Your Hosting
Real estate sites are demanding. When you build a real estate website with WordPress, you’ll have hundreds of property photos, IDX feed updates running every hour, and buyers browsing on mobile at open houses. Your host has to keep up.
Our top pick for most agents is SiteGround GrowBig. It’s $5.49/month for the intro term and $27.99/month at renewal, per SiteGround’s WordPress Hosting page . You get managed WordPress, staging, a built-in CDN, and support that picks up when an IDX sync misbehaves.
Here’s the honest comparison.
SiteGround GrowBig (recommended for solo agents and small brokerages)
- Pros: Managed WordPress, daily backups, staging, built-in CDN, real human support.
- Cons: Steep renewal price ($27.99/month after intro).
- Price: $5.49/month intro, $27.99/month renewal.
Kinsta Single 20GB (best performance for developers and growing brokerages)
- Pros: Google Cloud C2 servers, daily backups, free staging, the best raw performance in the comparison.
- Cons: Highest price; overkill for a solo agent under 200 listings.
- Price: $35/month monthly, or $30/month annual, per Kinsta’s pricing page.
Cloudways DigitalOcean 1GB (best for developers, pay-as-you-go)
- Pros: No visit caps, no surprise renewal spikes, developer-friendly.
- Cons: Less hand-holding for beginners; you’ll meet a server console.
- Price: Around $14 per month for the smallest DigitalOcean tier (per public pricing).
Bluehost Basic (entry option only)
- Pros: Lowest entry cost; easiest first install; well-known brand with one-click WordPress installs (Bluehost is on WordPress.org’s featured-hosts list, which is a paid placement program rather than a neutral endorsement).
- Cons: Shared hosting; can struggle with 500+ listings plus IDX sync jobs.
- Price: Around $3 to $5 per month on intro pricing, renews significantly higher.
The intro price is what you pay year one; the renewal is what you pay every year after. Plan for it.
For a solo agent getting started, SiteGround GrowBig gives you the best balance of price, performance, and support. Developer note: if you’re building for a client who expects high traffic or needs staging plus SSH on day one, go with Cloudways or Kinsta.
Once you’ve chosen your host, install WordPress with one click from your hosting dashboard. That’s it for the hosting step!
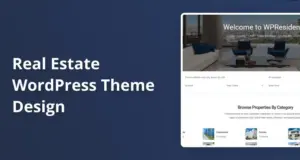
Step 2: Pick the Right Real Estate WordPress Theme
Choosing the right theme is the most important decision you’ll make when you build a real estate website. It’s your property database engine. The wrong theme means rebuilding later, so let’s get this right. If you’re still narrowing down what your site should look like before picking a theme, browse our gallery of real estate website templates — it’s faster to react to finished designs than to imagine them from a feature list.
Here’s how the four main options stack up.
| Theme | Price | Sales / Users | IDX Integration | Demos | Learning Curve |
|---|---|---|---|---|---|
| WPResidence | $79 one-time | 32,000+ buyers | Manual entry built-in; RESO Web API via mlsimport plugin (800+ MLSs) | 50 | Moderate |
| Houzez | $79 one-time | 56,000+ buyers | Via Realtyna plugin | Multiple | Moderate |
| Real Homes | ~$79 one-time | 32,000+ buyers | Via plugins | Multiple | Low to Moderate |
| Estatik | Free (Pro paid) | WordPress.org listed | Basic IDX support | Limited | Low |
Houzez and Real Homes are both legitimate picks. Estatik gives you a free path on a tight budget. All three are solid options.
That said, here’s our pick.
WPResidence
WPResidence is hands down the best real estate WordPress theme on the market.
It’s been around for 11 years, has over 32,000 buyers, and holds a 4.85/5 rating with 1,644 verified reviews on its ThemeForest listing (verified May 2026). That kind of track record matters when you’re building a site your business depends on.
What makes WPResidence the smart pick is what’s bundled in. The theme ships with Elementor, 170+ real estate-specific Elementor widgets, WPBakery, and Revolution Slider, tools that would cost over $200 if bought separately. The built-in agent membership module, front-end property submission, and native MLS integration make it a full real estate portal, not just a a beautiful real estate website design .
Key Features:
- 50 ready-to-use demo templates, importable in one click
- Advanced property search with unlimited custom fields
- Native MLS/IDX integration via RESO Web API (800+ US and Canadian markets)
- WPResidence Elementor Studio with 170+ real estate-specific widgets
- Front-end property submission plus agent membership module
- 9 configurable property card designs
- Google Maps and OpenStreetMap support
- Builder for lead generation forms
- Built-in schema markup for property listings
- Hundreds of narrated video tutorials
- A real estate CRM with Hubspot syncronization
Pricing: $79 for a single-site license, one-time, no annual renewal.
Get started with WPResidence today. You can explore WPResidence demos before you buy.
Building for a brokerage instead of a solo agent? The feature priorities shift: multi-agent dashboards, office-level branding, lead routing, and per-agent subdomains matter more than demo variety. We covered those trade-offs separately in our WordPress theme for real estate agencies breakdown. WPResidence still wins for most agencies, but the reasoning is different.
Don’t worry about the learning curve. The 450+ Theme Options panel sounds intimidating, but most agents only touch 10 to 15 settings. If you’re on a tight budget, Estatik offers a free version on WordPress.org. It’s solid for a basic portfolio, but it lacks the built-in IDX integration and real estate widgets that WPResidence ships with.
Step 3: Install and Configure WPResidence
You’ve picked your host and your theme. Now let’s configure WPResidence and get your real estate website built and running — don’t worry, this is easier than it sounds.
Download and Install the Theme
After your ThemeForest purchase, download the full theme package ZIP from your ThemeForest downloads page.
In your WordPress dashboard, go to Appearance » Themes » Add New » Upload Theme. Click Choose File, select the ZIP, and click Install Now. Then click Activate.
You’ll see a notice prompting you for your ThemeForest purchase code (required for updates and support). Paste it in. A second notice will ask you to install required plugins. Click “Begin installing plugins” and follow the prompts to install Elementor and the WPResidence Elementor Widgets, per the WPResidence help documentation.
Import a Demo
Note: Import only ONE demo on a fresh WordPress installation. Do NOT import multiple demos or import on top of existing content. The import replaces all Theme Options with demo settings, and double-importing breaks menus, widgets, and pages.
Before importing, install the SVG Support plugin from WordPress.org and enable it for administrators only. WPResidence demos use SVG icons, which WordPress core blocks by default.
Then go to Import Demo Data in your dashboard left menu. You’ll see a grid of 50 demo previews. Pick one close to your brand, you’ll be customizing it anyway. Click Confirm and grab a coffee.
When you see “Import Complete”, you can delete the One Click Demo Import plugin. If your demo includes Revolution Slider sliders, import those manually from the theme package ZIP at demo_content/revolution_sliders via Revolution Slider » Import. The WPResidence demo import guide covers the edge cases.
Flush Your Permalinks
This is the single most commonly skipped step, and it bites people hardest. Go to Settings » Permalinks and click Save Changes. You don’t need to change anything.
Note: Skip this step and every property URL returns a 404 error. Flushing registers the custom post type rewrite rules. It’s the #1 setup mistake. That’s it!
Add Your Branding and Colors
In your dashboard left sidebar, click Theme Options. You’ll see 450+ settings organized into tabs: General, Header, Colors, Fonts, Property Options, Map Settings, and more.
Upload your logo at Theme Options » General » Logo. Set your brand colors at Theme Options » Colors. Add your Google Maps API key at Theme Options » Map Settings (requires a free API key from the Google Cloud Console).
Most agents customize 10 to 15 settings and they’re done. Now let’s add properties.
Step 4: Set Up Your Property Listings
Now for the fun part. In your dashboard, go to Properties » Add New. You’ll see a detailed form with everything you need.
The Fields Every Listing Needs
WPResidence’s Properties » Add New form has dedicated fields for everything below. No extra plugins needed. Fill them in completely — buyers who see incomplete listings bounce faster than those with full details.
- Address (street, city, state, zip)
- Listing price
- Bedrooms and bathrooms (including half-baths)
- Square footage (interior living area)
- Lot size
- Year built
- Property type (Single Family, Condo, Commercial, Land, etc.)
- MLS number
- Listing date
- Agent of record (linked to agent profile)
- HOA fee (if applicable) and property taxes (annual estimate)
- Property status (For Sale / For Rent / Sold / Pending)
- Description (written narrative)
- Photos and virtual tour URL (covered next)
- Floor plan image
- Neighborhood and school district data
According to NAR’s 2024 Profile of Home Buyers and Sellers, detailed property information is cited as valuable by 39% of buyers, second only to photos at 41%, with floor plans at 31%. Skipping fields means losing buyers who were ready to call.
Photos and Virtual Tours
Don’t just upload two exterior shots and call it a day. Buyers decide whether to visit in person based on photos alone.
Listings with 20 photos stay on the market for an average of 32 days, compared with 70 days for one-photo listings, per PlanOmatic’s analysis echoing Zillow research. Cover the exterior, every interior room, the kitchen, all bathrooms, and the yard.
Upload in JPEG or WebP format. WPResidence builds the gallery automatically. For virtual tours, paste a Matterport or YouTube URL into the virtual tour field. According to Zillow’s 2024 Consumer Housing Trends Report, 67% of buyers wished more listings had 3D tours, and 72% agreed 3D tours give a better feel for a space than static photos.
Note: If you use mlsimport for live MLS listings, photos are served from the MLS’s own CDN — not your server. A site with 5,000 imported listings and 25 photos each doesn’t use a single byte of your hosting storage for those images.
Location and Maps
Each property has a map field. Enter the full address in Property Details and WPResidence will pin it on Google Maps automatically. You’ll see the map preview update in real time.
Assign each property to City and Neighborhood taxonomies. This creates filterable archive pages (like /properties/neighborhood/downtown/) that are SEO-indexed. These taxonomy pages are the foundation for the area guides we’ll build in Step 6.
Schema Markup for Property Listings
Schema markup tells Google what your page is about (price, address, beds and baths) so it can show rich details in search results.
For real estate, the schema type you want is RealEstateListing. WPResidence generates it natively for every property page and you don’t write a line of code. To verify, copy any property URL into Google’s Rich Results Test (search.google.com/test/rich-results). You should see RealEstateListing detected with price, beds, baths, and square footage extracted.
Developer note: Confirm RealEstateListing schema generates on property single pages before launch — it separates a professional build from an amateur one.
Step 5: Connect Live MLS Listings with mlsimport
Before you connect live listings, you need to understand what IDX actually means. It’s the part of the build that confuses agents the most. And the part that makes or breaks your SEO.
Don’t worry if this is your first time hearing these terms. Here’s what you need to know:
- MLS (Multiple Listing Service): the cooperative database where licensed agents share listing data.
- IDX (Internet Data Exchange): the policy and technology framework that lets agents display MLS listings on their own sites.
- RETS vs RESO Web API: Older IDX plugins use RETS, a legacy XML format that RESO officially deprecated in 2018. The modern standard is the RESO Web API: RESTful, JSON-based, and consistent across 800+ MLS boards.
Note: To display live MLS listings, you must be a licensed real estate agent or broker AND an active member of your local MLS board. The plugin alone is not enough. MLS boards typically charge an annual IDX/API access fee (about $100 to $250/year). If your membership lapses, IDX agreements typically require you to remove affected listings promptly.
One more concept matters: organic vs iframe IDX.
- Iframe / subdomain IDX: Listings live on a third-party server. Your site shows a window into them. Google can’t index those pages as your content. Fast to set up, slow to rank.
- Organic / native import: Listings are imported directly into your WordPress database as native posts. Google indexes every property page. Each listing builds your domain’s authority.
MLSimport
MLSimport is the best WordPress MLS / IDX plugin for WPResidence users.
It uses the RESO Web API to import listings as native WordPress posts. Every imported property is a real page on your site, indexed by Google, building your domain authority. Legacy iframe-based plugins miss all of that.
MLSimport connects to 800+ MLS markets across the US and Canada. Because it serves listing photos from the MLS’s own CDN, you’re not storing 125,000 property photos on your hosting plan. Even with 5,000 imported listings.
Key Features:
- Connects to 800+ MLS markets via RESO Web API
- Imports listings as native WordPress posts (fully SEO-indexed)
- Photos served from the MLS CDN (no hosting storage cost)
- 30-day free trial included
- Works natively with WPResidence
- Configurable import filters and auto-updates as MLS data changes
Pricing: $49/month billed monthly, or $42/month billed annually (saves 15%). 30-day free trial included; you’ll register with a card and get billed after the trial period, per pricing page (verified May 9, 2026).
Start your free 30-day mlsimport trial today. See how IDX integration works with WPResidence for the full walkthrough.
You’ll see other IDX options in your research. IDX Broker (Lite around $55/month, Platinum around $90/month) uses iframe display by default . Google can’t index those listing pages. Showcase IDX offers semi-organic HTML on your domain at around the high $70s to high $80s per month. Realtyna’s WPL Basic is free, WPL Pro is $199 one-time, and supports organic import. dsIDXpress is iframe-based and lower-cost. Each has its trade-offs.
Developer note: Agent clients supply their RESO API credentials from their MLS board. You install and configure; they provide the credentials. MLS board approval typically takes 3 to 10 business days. Plan that into your timeline.
That’s it! Your site now has live MLS listings updating automatically.
Step 6: Add the Content That Turns Visitors into Leads
Listings will bring buyers to your site once. Content will bring them back every week until they’re ready to make an offer.
Area guides and neighborhood pages. Create one page for each neighborhood you serve. Include school district data, walkability scores, local attractions, and transit options. These pages rank for “[neighborhood] homes for sale” queries — some of the highest-converting real estate searches. Go to Pages » Add New and build each guide as a long, photo-rich page with an embedded WPResidence neighborhood search. How to create neighborhood guide pages for real estate covers the SEO angle.
School district pages. A sub-page covering school ratings and district boundaries. Buyers with kids consistently filter by school quality before they ever contact an agent.
Blog. Publish monthly market reports (“Average home prices in [city], May 2026”) and evergreen guides (“First-time buyer checklist for [city]”). WordPress Posts are perfect for this.
Agent bios. WPResidence has a built-in agent directory. Go to Agents » Add New. Fill in the agent’s name, photo, bio, contact info, and license number. Buyers want to know who they’re trusting with a $500,000 decision.
Lead magnets. A “What’s my home worth?” form is the highest-converting seller lead magnet in real estate. Use WPForms or Gravity Forms. A gated “Download our [Neighborhood] Buyer’s Guide” PDF turns a browser into a lead.
Email capture. Install Mailchimp for WordPress (free) or OptinMonster. Mailchimp has a free tier for small contact lists.
Mortgage calculator. Embed the WPResidence built-in mortgage calculator widget on single property pages. Buyers use it to pre-qualify themselves before calling you.
Saved-search alerts. WPResidence includes saved search out of the box. Buyers register and receive email alerts when new listings match their criteria.
Note: Area guides and a blog are the content most agents forget to build. They’re why a 2-year-old agent site can outrank a brand new IDX portal.
You don’t need all of this on launch day. Start with agent bios, a contact form, and one neighborhood guide. Add the rest as your site grows.
Step 7: Performance, SEO, and Security
Real estate sites are image-heavy and database-intensive. Without the right setup, pages load slowly, rankings suffer, and buyers bounce. The stack below covers performance, SEO, and security. For the full extended list including lead capture, forms, and CRM, see our real estate WordPress plugins guide.
WP Rocket (caching). WP Rocket is hands down the best WordPress caching plugin on the market. It pre-renders your pages, lazy-loads property images, and handles CDN integration. As Ian Pham, Platform Lead at GTmetrix, says on the WP Rocket pricing page, “The GTmetrix team has tested WP Rocket extensively and found it to be one of the most effective and simplest plugins to improve WordPress performance.” Pricing is $59/year for a single site (verified April 2026). Note: Exclude your property search results page from cache — search results are dynamic and must not be cached.
Yoast SEO Premium. $118.80/year per site, per Yoast’s product page (current published price; renewal terms and bundles may vary). Includes Local SEO, XML sitemaps, and helps you optimize neighborhood pages for local queries. After installing, go to SEO » General — you’ll see a setup wizard that tunes the core settings for you. Rank Math Pro is a strong alternative at a lower price point.
Wordfence Premium (security). $149/year per site, per Wordfence’s December 2024 price-update post. Real-time firewall rules and malware scanning. Real estate sites collect personal contact information — names, emails, phone numbers. A breach is a GDPR and liability issue.
Image optimization. For photos you upload manually, install Imagify or ShortPixel to auto-convert to WebP. If you use mlsimport, those photos come from the MLS CDN and don’t need optimization on your end.
Google Business Profile (local SEO). Claim your Google Business Profile at business.google.com. Complete every field: business name, address, phone, website URL, service area, photos. Keep your NAP (Name, Address, Phone) identical across GBP, your LocalBusiness schema, and your contact page. Consistent NAP is what drives “realtor in [city]” ranking. It’s free.
That’s it! Your site is optimized for speed, search, and security. Performance optimization for real estate WordPress sites goes deeper if you want to push Core Web Vitals further. Let’s talk costs.
How Much Does It Cost to Build a Real Estate Website with WordPress?
How much does it cost to build a real estate website? More than a typical WordPress blog — but far less than hiring a developer to build something custom. Here’s the honest breakdown.
| Item | Barebones Build | Professional Build |
|---|---|---|
| Domain name (1 year) | ~$12/year | ~$12/year |
| SiteGround StartUp hosting (intro year) | $35.88/year ($2.99/mo) | n/a |
| SiteGround GrowBig hosting (intro year) | n/a | $65.88/year ($5.49/mo) |
| Kinsta Single (annual, optional premium pick) | n/a | $360/year ($30/mo) |
| WPResidence theme license (one-time) | $79 | $79 |
| mlsimport subscription | $588/year ($49/mo) | $504/year ($42/mo annual) |
| WP Rocket (caching) | n/a | $59/year |
| Yoast SEO Premium | n/a | $118.80/year |
| Wordfence Premium (security) | n/a | $149/year |
| Email service (Mailchimp small-list free tier) | $0 | $0 to $240/year |
| MLS board IDX/API access fee (varies by board) | $100–$250/year | $100–$250/year |
| Year 1 TOTAL | ~$865 | ~$1,290 to $1,590 |
| Year 2+ TOTAL | ~$960 (SiteGround renews $191.88) | ~$1,380 to $1,580 |
Note: Last verified May 9, 2026. Barebones uses Yoast SEO free, WPForms Lite (free), no caching plugin. The MLS board IDX/API access fee ($100–$250/year) varies widely by board — contact your local MLS for the exact figure.
Developer note: A professional client build typically runs $1,200 to $1,600/year in ongoing costs. Factor in your development time separately. A full WPResidence build with IDX integration usually takes 10 to 20 hours for an experienced developer.
For context, turnkey IDX platforms like Real Geeks or BoomTown charge monthly subscription fees in the low- to mid-hundreds-per-month range, and you don’t own your content. A WordPress + WPResidence + mlsimport stack gives you comparable functionality with full ownership at a fraction of the cost.
If the professional stack feels like a lot, start with the barebones build and upgrade as your business grows. WPResidence’s $79 one-time license never gets more expensive.
Key Takeaways
- WordPress powers 59.6% of all CMS-tracked websites and is the only platform with a mature IDX/MLS plugin ecosystem for real estate.
- WPResidence costs $79 one-time and ships with 50 demo templates, Elementor real estate widgets, and native RESO Web API MLS integration.
- Listings with 20 photos sell more than twice as fast as one-photo listings (32 days vs 70 days on market), per PlanOmatic’s analysis citing Zillow research.
- To display live MLS listings via IDX, you must be an active licensed agent and MLS board member — the IDX plugin alone is not enough.
- A barebones real estate WordPress site costs about $865 in year one; a professional stack runs $1,290 to $1,590 (verified May 2026).
Frequently Asked Questions
Can I build a real estate website with WordPress for free?
The WordPress software itself is free, but you’ll need paid hosting (around $3 to $35/month), a theme ($0 to $79), and IDX access fees if you want live MLS listings. A barebones WPResidence site runs about $865 in year one. If you only need a portfolio of manually-entered listings, Estatik has a free version on WordPress.org that works on a tight budget.
Do I need to be an MLS member to show live listings?
Yes. To display live MLS listings on your site through any IDX plugin, including mlsimport, you must be a licensed agent or broker AND an active member of your local MLS board. Your MLS board provides the RESO API credentials the plugin needs. Without those, you can only display listings you manually enter (new construction, exclusive listings, FSBO).
What is the difference between IDX and MLS?
The MLS (Multiple Listing Service) is the cooperative database where licensed agents share listing data. IDX (Internet Data Exchange) is the policy and technology framework that lets agents display those MLS listings on their own websites. The MLS is the data source; IDX is the permission layer. An IDX plugin like mlsimport is the software that connects your WordPress site to your MLS board’s IDX feed.
How long does it take to build a real estate website with WordPress?
From zero to live, plan on 2 to 4 days using WPResidence with a demo import. From live to your first IDX-powered listing, add 3 to 10 business days for MLS API credential approval from your local MLS board. Any guide that promises a few hours is glossing over the MLS step.
Does WPResidence include SEO and schema markup?
Yes. WPResidence generates RealEstateListing schema natively for every property page, which is what foogle needs to show rich result snippets. Use RealEstateListing schema for property pages, plus LocalBusiness schema on your About/Contact page. Yoast SEO Premium or Rank Math Pro generates both for you. The theme handles property-level schema; your SEO plugin handles the rest.
That’s it! You now have everything you need to build a professional real estate website with WordPress — from choosing your host to importing live MLS listings to turning browsers into leads.
Now that your site is live, set up your Google Business Profile to start ranking for local searches. It’s free, and most agents skip it.
You might also want to check out:
- How to Set Up IDX on WPResidence
- How to Create Neighborhood Guide Pages That Rank
- WPResidence vs Houzez: Which Real Estate Theme Is Better?