
Last updated: July 28, 2026
A secure client and agent login area on a real estate WordPress site comes down to two tools doing two jobs. WPResidence, the theme, decides who gets an account and what each role sees once inside, through four native front-end roles and their dashboards. LoginPress does the heavier lifting on the login screen itself: it brands that screen for free, and through its paid add-ons it sends each role to the right destination after login and locks the form against password-guessing attacks. Together they give you a complete client and agent login area in WordPress: an agent signs in and lands on their own WordPress agent dashboard of listings and leads, a client lands on saved searches and favorites, your administrator is untouched, and repeated failed logins get locked out. WPResidence sets the stage. LoginPress is the tool you actually configure to control and secure the door.
What WPResidence Gives You Before Any Plugin
The WPResidence theme covers the account side entirely, before you touch a plugin. In the 11 years we’ve spent building WPResidence for more than 32,000 clients (the count on our own homepage), the most common mix-up we see is someone expecting a login plugin to create real-estate roles. It doesn’t. The theme does.
WPResidence ships four front-end roles you toggle individually in Theme Options: Regular User, Agent, Agency, and Developer. Agencies can connect several agent accounts and control which team listings are visible, while regular agents own only their own properties. You can require manual approval before a new Agent, Agency, or Developer profile goes live, and with user separation on, non-admin roles never see wp-admin at all.
Each role gets a front-end dashboard. The classic User Dashboard spans nine pages (favorites, saved searches, properties, invoices, and more), while the separate CRM added in version 5.6.0 (April 2026), per the WPResidence changelog, adds a landing page plus eight sections for enquiries, contacts, leads, deals, and tasks.
There’s also a built-in Forced Registration gate that can require visitors to register after viewing a set number of listings. For most real estate sites, those native roles and dashboards are the right starting point, full stop, before any plugin. That is where LoginPress comes in.
What Does LoginPress Add to Your Login Screen?
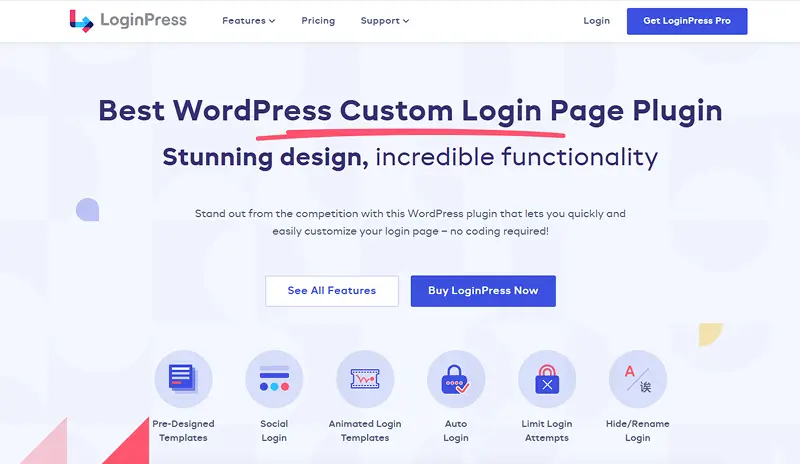
WPResidence hands every one of those roles the same login form. LoginPress takes that shared form and does three things the theme doesn’t: it restyles it, it decides where each role goes after signing in, and it stops attackers from hammering it. LoginPress creates no roles and builds no dashboards. It owns the login screen and what happens at it.
The free LoginPress plugin has more than 200,000 active installations on WordPress.org, runs on WordPress 4.0 and up, and sits at version 6.2.5. The branding is free; the behavior lives in paid add-ons. Here’s the split.
| Feature | Free or Pro |
|---|---|
| Custom login-page branding and design | Free (core plugin) |
| Login redirects | Pro add-on |
| Role-based redirects and access | Pro (the same add-on as login redirects) |
| Limit login attempts | Pro add-on |
| Social Logins | Pro add-on |
Branding the Login Page (Free)
The core plugin is built on the WordPress Customizer, so you edit the login page with a live preview beside you and nothing goes live until you save. You’ll see controls to swap the default WordPress logo for your brokerage’s, set a background image or a solid color, and restyle the form fields and the button to match your site.
You can also rewrite the wording: the error messages, the welcome text, and the footer line all become yours. The result is responsive by default, so the login screen holds up on a phone. This is the whole free tier, and for a solo agent who only wants a branded custom login page, it may be all you ever install.
Login Redirects: Send Each Role Where It Belongs
By default, everyone who signs into WordPress lands in the same place. That’s wrong for a real estate site, where an agent needs their listings dashboard and a client needs saved searches. The Login Redirects add-on fixes it by letting you set a destination per role, or even per username.
So you point the Agent role at the agent dashboard, the Regular User role at favorites, and leave the administrator on the normal WordPress dashboard. The same add-on can restrict access to sensitive pages like wp-admin, so a logged-in client never wanders into the back end. Role-based redirects are not a separate purchase: they’re a setting inside this one add-on, so buying Login Redirects once gets you both plain and per-role rules.
Limit Login Attempts: Lock Out the Guessers
A login form with no attempt limit is an open door to brute-force bots. The Limit Login Attempts add-on caps how many failed tries an IP gets before it’s locked out, one of the strongest defenses against automated password guessing, alongside strong passwords and two-factor authentication.
You set the attempts-allowed threshold yourself. Dynamic Lockout then lengthens the lockout automatically for repeat offenders, so a persistent bot waits longer each round. You can whitelist your own office IPs so your team never gets locked out, blacklist known-bad ones outright, and disable XML-RPC, a legacy WordPress endpoint attackers often abuse for login attempts. It’s the security half of the plugin, and the next section explains why it matters.
Social Login: One-Click Sign-In for Buyers and Sellers
Registration friction costs you leads. On a real estate site, the moment a visitor hits a form to save a favorite or book a viewing is the moment a good share of them leave. The Social Login add-on removes that step by letting people sign in with an account they already have: Google, Facebook, X, or LinkedIn, among 15 or more providers.
On a WPResidence site this matters most at the Regular User level. A buyer who wants to keep a shortlist of properties can be inside their dashboard in one click, with no password to invent and no confirmation email to chase. Agents get a different benefit: a social account carries a verified email and a real name, so the lead record is cleaner than a hand-typed one.
It also cuts spam signups, because a bot needs a real social account to get through. If you run Forced Registration, pair it with Social Login. The gate stays up while the cost of passing it drops.
LoginPress Pricing: Startup, Agency, Lifetime
LoginPress sells three paid tiers, at current pricing. Startup is $99 per year for two sites and bundles the add-ons that matter here: Login Redirects, Limit Login Attempts, and Social Login. Agency is $199 per year for unlimited sites and includes all current and future add-ons. Lifetime is a one-time $499 for unlimited sites and no renewals.
Every paid tier includes both Login Redirects and Limit Login Attempts, so there’s no cheaper “redirects only” option below Startup. All three come with a 14-day money-back guarantee, so you can test the redirects and lockouts on a live secure agent portal before committing.
How to Set Up a Client and Agent Login Area, Step by Step
Here’s the whole build, theme first, then plugin. Follow these seven steps in order to stand up a client and agent login area in WordPress from scratch.
- In WPResidence Theme Options, enable the roles you need, where you’ll see an on/off switch for each of Regular User, Agent, Agency, and Developer.
- Turn on manual approval for Agent, Agency, and Developer on the same Theme Options screen if you want to vet new signups before they publish.
- Turn on Forced Registration if you want lead capture, then set the property view limit, gallery limit, reset period, and message text.
- Install the free LoginPress plugin and open the WordPress Customizer to brand the login screen: logo, background, form styling, and the welcome, error, and footer messages, all with a live preview.
- Buy a LoginPress plan for the behavior add-ons, since Login Redirects and Limit Login Attempts are both paid (Startup at $99 per year is the floor).
- In the Login Redirects add-on, set a destination per role: Agent to the /my-properties/ page, Regular User to /favorites/, and administrator left on the WordPress dashboard, then restrict wp-admin for non-admin roles.
- In the Limit Login Attempts add-on, set your attempts-allowed threshold, enable Dynamic Lockout, whitelist your office IP, and optionally disable XML-RPC.
Steps 1 through 3 are free and native; steps 4 through 7 are all LoginPress, where the login area gets its polish and protection.
Should You Gate Listings Behind Forced Registration?
Forced Registration is optional. It gates listing or gallery views behind a quick signup, turning browsers into contacts, but it adds friction too, so it’s a trade rather than a free win.
The upside is real. Real-estate marketing platform Luxury Presence reports that forced registration (a visitor registers after viewing a set number of listings, typically three to five) is consistently the top-volume lead source on the agent sites it runs, and credits Google One Tap alone with 228,000 leads across its client sites in its 2024 data. Treat those as Luxury Presence’s own platform numbers, not a universal law, and test the threshold against your own traffic.
What Are You Actually Defending Against?
The Scale of Login Attacks
As of Wordfence’s 2021 mid-year report, the security firm blocked more than 86 billion password-attack requests aimed at WordPress login forms in the first six months of 2021, with June 2021 alone accounting for over 18.5 billion.
Wordfence counts a password attack as any failed login attempt through the standard wp-login.php page, through XML-RPC, or any other login path. That’s a 2021 figure, shown to convey scale, not today’s exact count. The point stands: an unprotected login form is a target around the clock.
What Limiting Login Attempts Actually Stops
Mart Virkus, Head of Marketing at Patchstack, writes that limiting login attempts matters for four reasons: “Protection Against Brute Force Attacks… Preventing Credential Stuffing… Mitigating Distributed Denial of Service (DDoS) Attacks… Protection Against User Enumeration.”
In plain terms, that’s password-guessing at scale, reused-password attacks (credential stuffing), login-page flooding, and probing for valid usernames. What it does not cover is a vulnerability inside a plugin or theme. Patchstack’s 2026 whitepaper found only 26% of vulnerability attacks were blocked by hosting-level defenses, a separate problem. LoginPress’s Limit Login Attempts is one strong layer, not the whole wall.
Agent-Side vs Client-Side: Two Setup Walkthroughs
A brokerage and a solo agent lean on the same two tools but configure LoginPress differently. The two walkthroughs below are illustrative, not named companies.
Scenario A: A Brokerage Locking Down Agent Dashboards
Here’s how a brokerage might set this up, agent-side.
- Enable manual approval for new Agent signups so no one joins until you’ve published their profile.
- Confirm user separation is on, keeping agents out of wp-admin and inside the front-end dashboard.
- Install LoginPress and buy the Startup plan at $99 per year; its two sites cover your live site plus staging.
- Brand the login screen on the free tier so agents see your brokerage, not a generic WordPress form.
- In Login Redirects, send the Agent role to the agent dashboard and restrict wp-admin so agents can’t reach the back end, while the administrator still lands there.
- In Limit Login Attempts, set a tight threshold and turn on Dynamic Lockout, since shared team credentials are a soft target for credential stuffing.
In practice, an agent signs in and drops straight into their own real estate client portal of listings and leads, and a bot working the login form gets locked out fast.
Scenario B: A Solo Agent Gating Saved Searches for Clients
Here’s how a solo agent might do it instead, client-side.
- Leave Agent, Agency, and Developer registration off, and enable only the Regular User role, which saves favorites and searches without a public profile.
- Turn on Forced Registration at a soft setting, say four properties before registering, rather than a hard paywall.
- Install the free LoginPress tier and brand the login and registration modal to match your site.
- Skip the Login Redirects add-on; with one role, there’s nowhere else to send anyone.
- Still enable Limit Login Attempts, because a public registration form is a known credential-stuffing target no matter how small the site.
The result is a lightweight, gated client area in WordPress: visitors browse a few listings, register to keep their favorites, and land in a branded dashboard.
Summary
- WPResidence’s four native roles (Regular User, Agent, Agency, Developer) create and scope dashboards before you install any login plugin.
- LoginPress’s free tier brands the login screen, but Login Redirects and Limit Login Attempts are paid add-ons bundled from $99 per year.
- LoginPress’s Login Redirects add-on sends each role to its own page after login and can block non-admins from wp-admin, all from one purchase.
- LoginPress’s Limit Login Attempts add-on adds an attempts threshold, Dynamic Lockout, IP allow and block lists, and an XML-RPC switch.
- Wordfence blocked more than 86 billion password-attack requests against WordPress logins in the first half of 2021 alone.
Frequently Asked Questions
Does WPResidence require a login plugin for client and agent accounts?
No. WPResidence handles roles, front-end dashboards, and the CRM natively, so client and agent accounts work the moment you enable the roles you want. LoginPress only becomes useful when you want to brand the login screen, send each role to a different page, or limit login attempts. That second layer is optional.
Is LoginPress free to use?
Partly. The core LoginPress plugin is free and covers login-page branding through the WordPress Customizer: logo, background, form styling, and the welcome, error, and footer messages. Redirects, role-based redirects, and limiting login attempts are paid add-ons in every tier, the cheapest being the Startup plan at $99 per year for two sites. On a WPResidence site, that’s the only paid layer you’ll usually need.
Can LoginPress send agents and clients to different pages after login?
Yes. LoginPress’s Login Redirects add-on sets a destination per role or per username, and can also block non-admins from wp-admin. On a WPResidence site, you point the Agent role at its listings dashboard and the Regular User role at saved searches, so each person lands where they need to be instead of the default WordPress screen. Role-based rules come with the same add-on, no separate purchase.
Does limiting login attempts stop all WordPress hacks?
No. Patchstack’s Mart Virkus scopes it to four attack types: brute force, credential stuffing, login-page DDoS, and username enumeration. It won’t patch a vulnerable plugin or theme, which is a separate problem. LoginPress adds this defense through its Limit Login Attempts add-on, but on a WPResidence site you should still run strong passwords, updates, and ideally two-factor authentication alongside it.
The division of labor is the whole trick. WPResidence decides who has an account and what they see once they’re in, and LoginPress is the tool you configure to control the login screen, route each role, and keep attackers out. Get the free layers working, then add LoginPress’s paid add-ons the moment you need redirects or lockouts.
Start by enabling the WPResidence roles you actually need and branding the login page with the free LoginPress tier. Add the Login Redirects and Limit Login Attempts add-ons when your client and agent login area in WordPress genuinely calls for them, and you’ll never pay for a feature you weren’t going to use.