A friend who runs a real estate portal with 40+ agents called me last month. “My agents keep submitting garbage listings. Half the fields are empty, the other half are wrong. I can’t babysit every single submission.”
I asked him one question: “Did you configure your submission form fields?”
Silence.
Here’s the thing. Most people install WPResidence, enable front-end submissions, and never touch the settings that control what agents actually see when they add a property. Then they wonder why listings look inconsistent.
The submission form is fully configurable. You decide which fields show up, which ones are mandatory, how many images agents can upload, and whether listings go live immediately or wait for your approval. All of it lives in one place: Theme Options > Submission and Membership.
Let me walk you through every option so you can set this up once and stop cleaning up after your agents.
Where to Find Everything
Go to Theme Options > Submission and Membership. That’s it. Every setting I’m about to cover lives in this section. The changes you make here apply to the front-end submission form, the “Add New Property” page that agents see in their user dashboard.
Quick note: these settings don’t affect how YOU add properties from the WordPress admin backend. They only control the front-end agent experience.
The Address Section: Autocomplete vs Dropdowns
The first setting you’ll see controls how agents enter the property address. You have two options:
Autocomplete set to Yes: The city and address fields will autocomplete using Google or OpenStreetMap. Agents start typing, suggestions appear, they pick one. Fast, accurate, and it pulls in coordinates automatically.
Autocomplete set to No: Instead of a text field with suggestions, agents get dropdown menus. This gives you more control over which locations are available. Useful if you only operate in specific cities or regions and don’t want agents listing properties outside your service area.
Which one should you pick? If your agents list properties across many locations, use autocomplete. It’s faster and pulls in GPS coordinates automatically. If you operate in a fixed set of areas, dropdowns keep things clean and prevent agents from listing in locations you don’t cover.
I’ve seen portals that serve a single city switch to dropdowns and immediately cut down on mislocated listings. On the other hand, national portals almost always need autocomplete. Nobody wants to scroll through 500 cities in a dropdown.
Selecting Which Fields Appear
Next up: Select the fields for listing submission.
This is where you decide what agents see in the submission form. Every possible field is listed here: property details, features, location data, everything. You check the ones you want, uncheck the ones you don’t.
Don’t need the “Yearly Tax Rate” field? Uncheck it. Don’t want agents setting a second price? Remove it. Only want the basics (title, price, description, images, and category)? Strip everything else out.
I’ve seen people leave all fields enabled and then complain that the submission form is “too long” or “confusing for agents.” This is the fix. Trim it down to what you actually need. A shorter form means faster submissions and fewer mistakes.
Making Fields Mandatory
Right below that, you’ll find Select the mandatory fields for listing submission.
This is the setting that would have saved my friend’s portal. If a field is mandatory, agents can’t submit the property without filling it in. No more empty price fields. No more listings without a category.
One rule to remember: a field must be enabled in the previous setting before you can make it mandatory. If you removed “Property Price” from the visible fields, you can’t make it required. Makes sense, but it trips people up.
My recommendation: at minimum, make the title, price, description, category, and at least one image mandatory. Everything else depends on your business. If you need square footage for every listing, make it required. If it’s optional info, leave it optional.
Image Upload Limits
The next setting is simple but important: Maximum number of images per property.
Set the number, and that’s the cap. If you set it to 10, agents can upload up to 10 images per listing. No more.
Why would you limit this? Server space, page load times, and consistency. If one agent uploads 3 photos and another uploads 50, your listing pages will look wildly different. Pick a number that works for your site. Somewhere between 10 and 25 is what most portals I’ve worked with use.
Admin Approval: Publish Automatically or Review First?
This one is a big deal: Submitted listings should be approved by admin.
Set to Yes: When an agent submits a property, it goes into a pending state. You (the admin) review it, check the details, and publish it manually. Nothing goes live without your approval.
Set to No: Every property an agent submits is immediately published and visible on your site. No review step.
If you have a small team of trusted agents who know what they’re doing, auto-publish is fine. If you run an open portal where anyone can sign up and submit listings, turn on admin approval. I’ve seen sites get spammed with fake listings because they left this set to “No.” Don’t be that site.
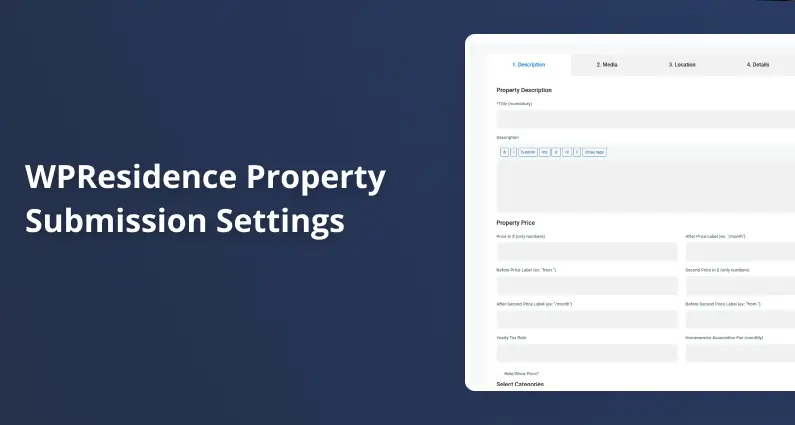
Price Fields and Labels
The price section in the submission form has more depth than most people realize. Here’s what agents can fill in:
- Main price: the primary property price
- Before label: text that appears in front of the price (example: “From”)
- After label: text that appears after the price (example: “per month”)
- Second price: an additional price field (useful for showing both sale and rental prices, or original vs discounted)
- Second price labels: same before/after labels for the second price
Each of these is a separate field you can enable or disable from Theme Options. If your site only shows sale prices, you probably don’t need the second price or the “per month” label. Disable them and keep the form clean.
The labels are more useful than they look. “From $250,000” or “$1,500 per month” gives visitors context that a naked number doesn’t. Tell your agents to use them, or better yet, make the label fields mandatory if your pricing format matters.
Tax Rate and HOA Fee (The Calculator Connection)
Two fields that confuse people: Yearly Tax Rate and Homeowner Association Fee.
These don’t show up on the property page itself. They feed into the property mortgage calculator that appears on listing pages. The calculator uses these values to give visitors a more accurate monthly payment estimate.
If you’re not using the property calculator on your site, disable both fields. No reason to ask agents to fill in data that goes nowhere. If you are using the calculator, keep them enabled and consider making them mandatory. A calculator with missing inputs gives wrong results, which is worse than no calculator at all.
I’ve had support tickets from people saying “the calculator shows wrong numbers.” Nine times out of ten, the tax rate and HOA fee fields are empty. The calculator does the math with whatever it has, and zero tax plus zero HOA gives buyers an unrealistically low monthly payment. Not a good look for your portal.
Categories and Property Types
The last section in the transcript covers Select Categories, which includes property Category and Type dropdowns.
The values in these dropdowns come from your WordPress taxonomy settings (the same place you manage property categories and types in the backend). Agents pick from the options you’ve already created. They can’t add new ones from the front end.
This is by design. You control the taxonomy, agents select from it. Keeps your listings organized and prevents the chaos of 15 different spellings of “apartment.”
Before you enable submissions, go to your WordPress backend and set up your categories and types properly. “Residential,” “Commercial,” “Land,” whatever makes sense for your market. If agents see a messy, incomplete dropdown, they’ll pick random values and your filtering won’t work. Garbage in, garbage out.
Set It Up Once, Then Move On
Here’s what I’d do if I were setting this up from scratch today:
- Enable only the fields your listings actually need. Less is more.
- Make the important ones mandatory: title, price, category, description, images.
- Set image limits to something reasonable (10-20).
- Turn on admin approval if you don’t fully trust every agent on your platform.
- Choose autocomplete for address if you cover many areas, dropdowns if you’re local-only.
- Disable tax rate and HOA fee if you’re not using the mortgage calculator.
That’s it. 10 minutes of configuration saves you hours of cleaning up bad listings.
If you found this useful, send it to whoever manages your property portal. And if something isn’t working the way I described, drop a comment. I’ll take a look.
FAQ
Where do I change what agents see on the WPResidence front-end property submission form?
In WPResidence, all of the controls for the front-end “Add New Property” experience live in one place: Theme Options > Submission and Membership. The settings in that section determine which fields appear on the agent submission form, which ones are required, image upload limits, and whether submissions publish immediately or wait for admin approval.
These options affect only front-end submissions from the agent dashboard. They do not change how you add or edit properties from the WordPress admin backend.
Should I use address autocomplete or location dropdowns for agent submissions?
Use autocomplete when your agents list properties across many locations. With Autocomplete set to Yes, agents can start typing a city/address and select from suggestions (Google or OpenStreetMap), which is faster and can pull coordinates automatically.
Use dropdowns when you operate in a fixed set of areas and you want tighter control. With Autocomplete set to No, WPResidence shows location dropdown menus instead, which can help prevent agents from submitting listings outside your service area and reduce mislocated properties.
How do I make sure agents cannot submit listings with missing critical fields?
In Theme Options > Submission and Membership, first choose which fields appear under Select the fields for listing submission. Then, under Select the mandatory fields for listing submission, mark the key fields as required so the property cannot be submitted until they are filled in.
One important rule: a field must be enabled (visible) before you can make it mandatory. A practical baseline is to require the title, price, description, category, and at least one image, and then require anything else your business needs on every listing.
What image limit should I set for property submissions, and why does it matter?
Set the Maximum number of images per property to cap how many photos an agent can upload for a listing. If you set it to 10, the agent can upload up to 10 images, but not more.
This matters for consistency, server space, and page load times. If one listing has 3 photos and another has 50, your listing pages can look inconsistent and load unevenly. Many portals choose a limit in the 10-25 range and adjust based on what their site can handle.
Do I need to enable Yearly Tax Rate and HOA Fee fields, and what do they affect?
Enable Yearly Tax Rate and Homeowner Association Fee only if you are using the property mortgage calculator shown on listing pages. In WPResidence, these fields feed the calculator so it can estimate a more accurate monthly payment.
If you are not using the calculator, disable both fields so agents do not waste time entering data that is not displayed. If you are using the calculator, consider making these fields mandatory, because missing values can lead to unrealistic payment estimates.